Selvedge Studio Blog / learn
-
February 01, 2014This is a quick video on how to make a simple, reversible tea towel.
-
January 03, 2014
Zippered Pillow

This is a quick tutorial to show you how easy it is to make a simple, gorgeous pillow with an invisible zip!
First thing is to cut out the fabric. a good rule of thumb is to cut your fabric the same size as your pillow form, that way it stays full and fluffy. Use 1/2" seam allowance and get a zipper as long as (or longer, you can trim) than one side of your pillow.
I am making a 20" x 20" pillow, so I cut two pieces 20" x 20". I trimmed off the selvedges, sometimes the selvedge is woven a bit tighter than the rest of the fabric and can cause you to end up with different size pieces once you start sewing.
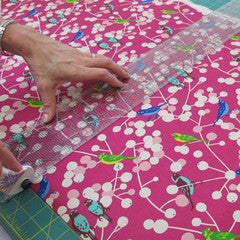
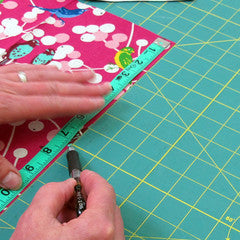
Here is a trick that the pros use: trim a scant 1/2" away, tapering towards the corners. This makes the corners pop out perfectly! First measure and mark, then cut.
This is what it looks like before you begin to sew.
First lets do the zip. I have directional fabric (the pattern has a distinct up and down) so I will put the zipper at the bottom of the pillow. The important thing to remember about invisible zippers is that they go on with the pull tab facing the fabric. The teeth face toward the body of the pillow, not the edge. Lay it on one piece fabric and with the top of the zipper lining up with the top of the pillow corner.
 Now sew the other side of the zipper, pay attention to how it is placed along the edge.Match the top of the zipper tape to the edge of the fabric and make sure the teeth are facing the the right direction
Put the two sides together and sew it up! Use a 1/2" seam allowance, just follow the edge of your fabric as a guide
Pivot at the corners! When you get to the zipper, just lay it flat and sew right over it, on both sides.Don't forget to leave it open a little so you can get it turned inside out again.
Trim the corners, it will make the edges pop right into place without added bulk.
Beautiful!
-
December 21, 2013
Pattern Review: McCall's 6848 Miss' Loungewear Shorts

Thinking about making McCall's 6848 pattern of miss' loungewear and want to know about our experience with it? Read on!
Miss Gwen here, seamstress and class teacher at Selvedge Studio.

Pattern Description: Miss' lounge wear suitable for soft, luxurious fabrics.
Pattern Sizing: Made in a medium--my own measurements are in between M & L, but I didn't want the shorts to be too baggy, so I went with the smaller size.
Did it look like the photo/drawing on the pattern envelope once you were done sewing with it? Yes, besides modifications made.
Were the instructions easy to follow? Super basic shorts pattern, so I didn't even look at the directions during the process. Reviewing the directions afterwards shows them to be easily followed.
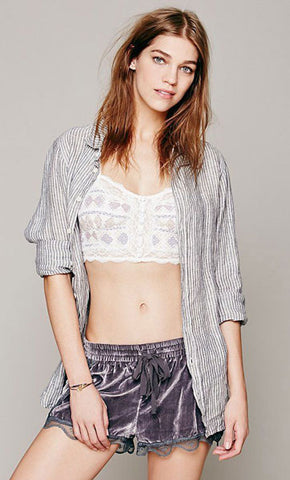
What did you particularly like or dislike about the pattern? I chose this pattern because of the curved (dolphin) hem on the legs. This project was inspired by a pair of lounge shorts from Free People with ruffles and ribbon bow, and we wanted to make a Selvedge version of them.
Fabric Used: 18% silk/82% rayon velvet for shorts, 100% silk ribbon for bow.
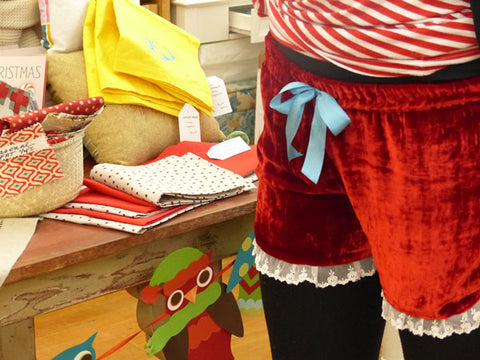
Pattern alterations or any design changes you made: Instead of using the ruffle included in the pattern, I chose to make a ruffled lace trim (using a ruffler foot on our ELNA machine) and sew it onto the hem of the shorts and continue up the side seams. Double casing for elastic waist band using 3/4" elastic, rather than a single casing. I tacked down a ribbon bow onto the center front waistband.
Would you sew it again? Would you recommend it to others? I would, as this pattern will be used for a class at Selvedge Studio in February! Silk velvet is not easy to cut/sew with, but the pattern itself does not add other complications into the mix. I would definitely recommend the pattern to someone wanting lounge wear with a basic design and easy details.
Conclusion: Easy pattern, good directions, and successful project. Material choices will change the level of sewing difficulty. I'm curious to make the romper as well, I think it would be adorable!


Inspiration: lounge shorts from Free People
Front and Back View


Happy Holidays!


